Of course, I sold it within the IMON family. The buyer may be bringing it to Carlisle 2000 - without me.
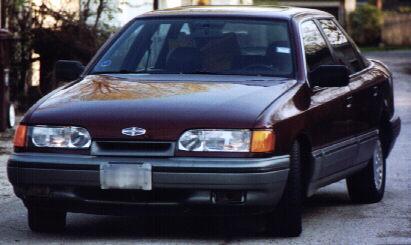
Cologne's finest, in its last US year. The only modifications on it are a Borla Stainless Steel exhaust, K&N air filter, and a light set from the Buropean edition. Otherwise it's straight stock, with the touring package included. (Power moonroof, trip/fuel computer, heated seats.)
Here it is after I put in the euro lights.
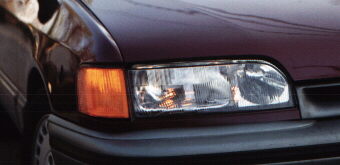
That slight glow is the "city lights" - apparently a normal feature in europe. When the parking lights are on, it activates a small bulb that just barely lights up the housing. It looks great when parked.
Isn't glass a huge improvement?
The biggest job? Painting and finishing the trim strip underneath. It comes in gray primer. First, I coated them (again) with plastic primer. I had a can of matching color made up, with flex additives for plastic, and sprayed on about 6 coats, then a clear coat (3 coats.) It's not quite as smooth as the hood, but what the heck! I went with the 4 relay setup, for max wattage.
There's a little fitting to be done, since the middle brackets don't quite line up. Also, the lights don't come with connectors - I got mine (through IMON) from a German junkyard. But you can get by without them.
Not to offend anybody, but I like the way it doesn't look like a Mustang any more.
Where'd I get 'em? BAT, of course. That's British American Transfer, 941-355-0005. Open 9-5 Eastern time. $649 plus shipping. They don't carry a lot of stock on these, so it may take a few weeks to get them.
Please note - this is installed with the american style center panel - this is NOT the full euro conversion.
Also the lights come as a turn signal and a light piece on each side. These are not the Cibie lights that I've heard of, which have one piece per side (including integral turn signals.)
Other questions - I went with the four-relay setup (as shown in the BAT instructions) - you put in four Hella relays attached to the battery (fused, of course) and wire the orignal light wiring to them. It takes a little while, and you can't tell from the dash whether you've blown a headlight any more, but hey - it beats a melted wiring harness. (With the relays you can run a lot more than the original 60 watts/side, and with the center driving lights, you can take it up to a total of 200 or more watts/side.
Whaddya get with the kit? The lights, bulbs, trim strips for underneath (plastic, primed) and a sheet of instructions. You'll need wire, 4 relays, crimp-on connectors, fuse and fuse holder. You'll have to fabricate a block to tie the lights into the US middle mounts, but the light is pretty secure with the other mounts as well.
If you want, add wiring connectors for the euro lights (BAT doesn't supply them, I got mine from a list member who was euro-junkyard hopping.) And maybe light holders for the turn signal lights - the originals only sort of fit. But you can do without both, and it'll be fine.
For wiring hints, click here.
For you XR owners, sorry - it seems there's a lot more metal work to fit XR euro lights. The Scorpio was imported virtually unchanged, other than the addition of a deck wing (to hold the center brake light and conceal the antenna) and changing out the light.
About that LHD - yes, BAT brings the lights in from England, so they're RHD. The lenses are glass, and clip on - Peter says about $100 to get LHD lenses, but that buying LHD lights from other than England is more than that in difference. I haven't noticed any big difference. They flare to the left, but nobody's flashing at me. I aim the left one a little lower, and both lights a little to the right, and it works great.
If you still don't understand, here's the flare pattern, as shown at about 8 feet on a garage wall. Most of the light is sent out straight and level, with a little thrown up and to the left for illuminating road signs, etc.
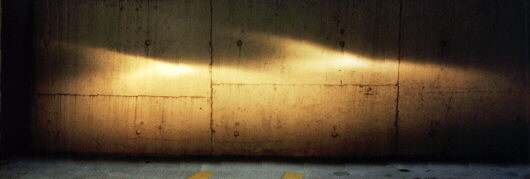
No, it's not an amateur UFO photo. Flare goes to the left. You know how, when you're driving in the rain, there's always a smear right in front of your eyes, and it's completely clear on the other side? That's how we know that the British are so much smarter than us!
Here it is before I put in the euro lighting.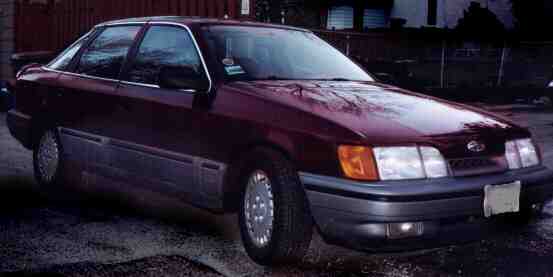
Notes from Steve Baert on the wiring
I rewired mine slightly different to make the bulb warning
indicator go out, but keep it functional. I was BAT's guinea pig for the
Scorpio euro light setup, so it took me a couple of days to "get it right".
I think proper ground is the key issue here. Euro Scorpio headlight
sockets come in 2 flavors. I was lucky enough to get one of each kind. One
light
has the 4 prong connector, the other has the 5 prong connector.
The 5 prong connector is nothing more than 1 extra ground for the city
lamps. I used the ground on the park light plug to go into this extra
connector.
Open up the headlight and you can trace the wires relatively
easily with a good flashlight. Then I used the brown wire on the main US
headlight plug to provide to the main ground wire for the Euro light. I am
using the 2 relay setup, so the yellow wire goes directly to low beam
connector on the Euro lights. For high beam however, I provided ground
from the relay to the main ground next to the radiator support where the horn
sits (on the passenger side). There is a large screw that provides ground
there to something else, and that is perfect to provide ground to the high
beam relay.
With the 4 prong connector, you do not need to get ground from the parking
light plug for the city bulb. You only need +12V for the city bulbs from
the parking light plug.
Duplicate for the driver side, and that should make the bulb out computer
shut up. At least that's what worked for me.
Hope this helps.
Note - my car had 4-pin and 5-pin as well. Seems common.